Plastic headlights go yellow and cloudy with age. The lenses on our 2006 Prado had got to that point, which looks tired and, more to the point, throws less light on the road at night. New headlights cost hundreds. The Turtle Wax Headlight Restorer Kit cost me about $50, so I tried that first.
What You’re Getting
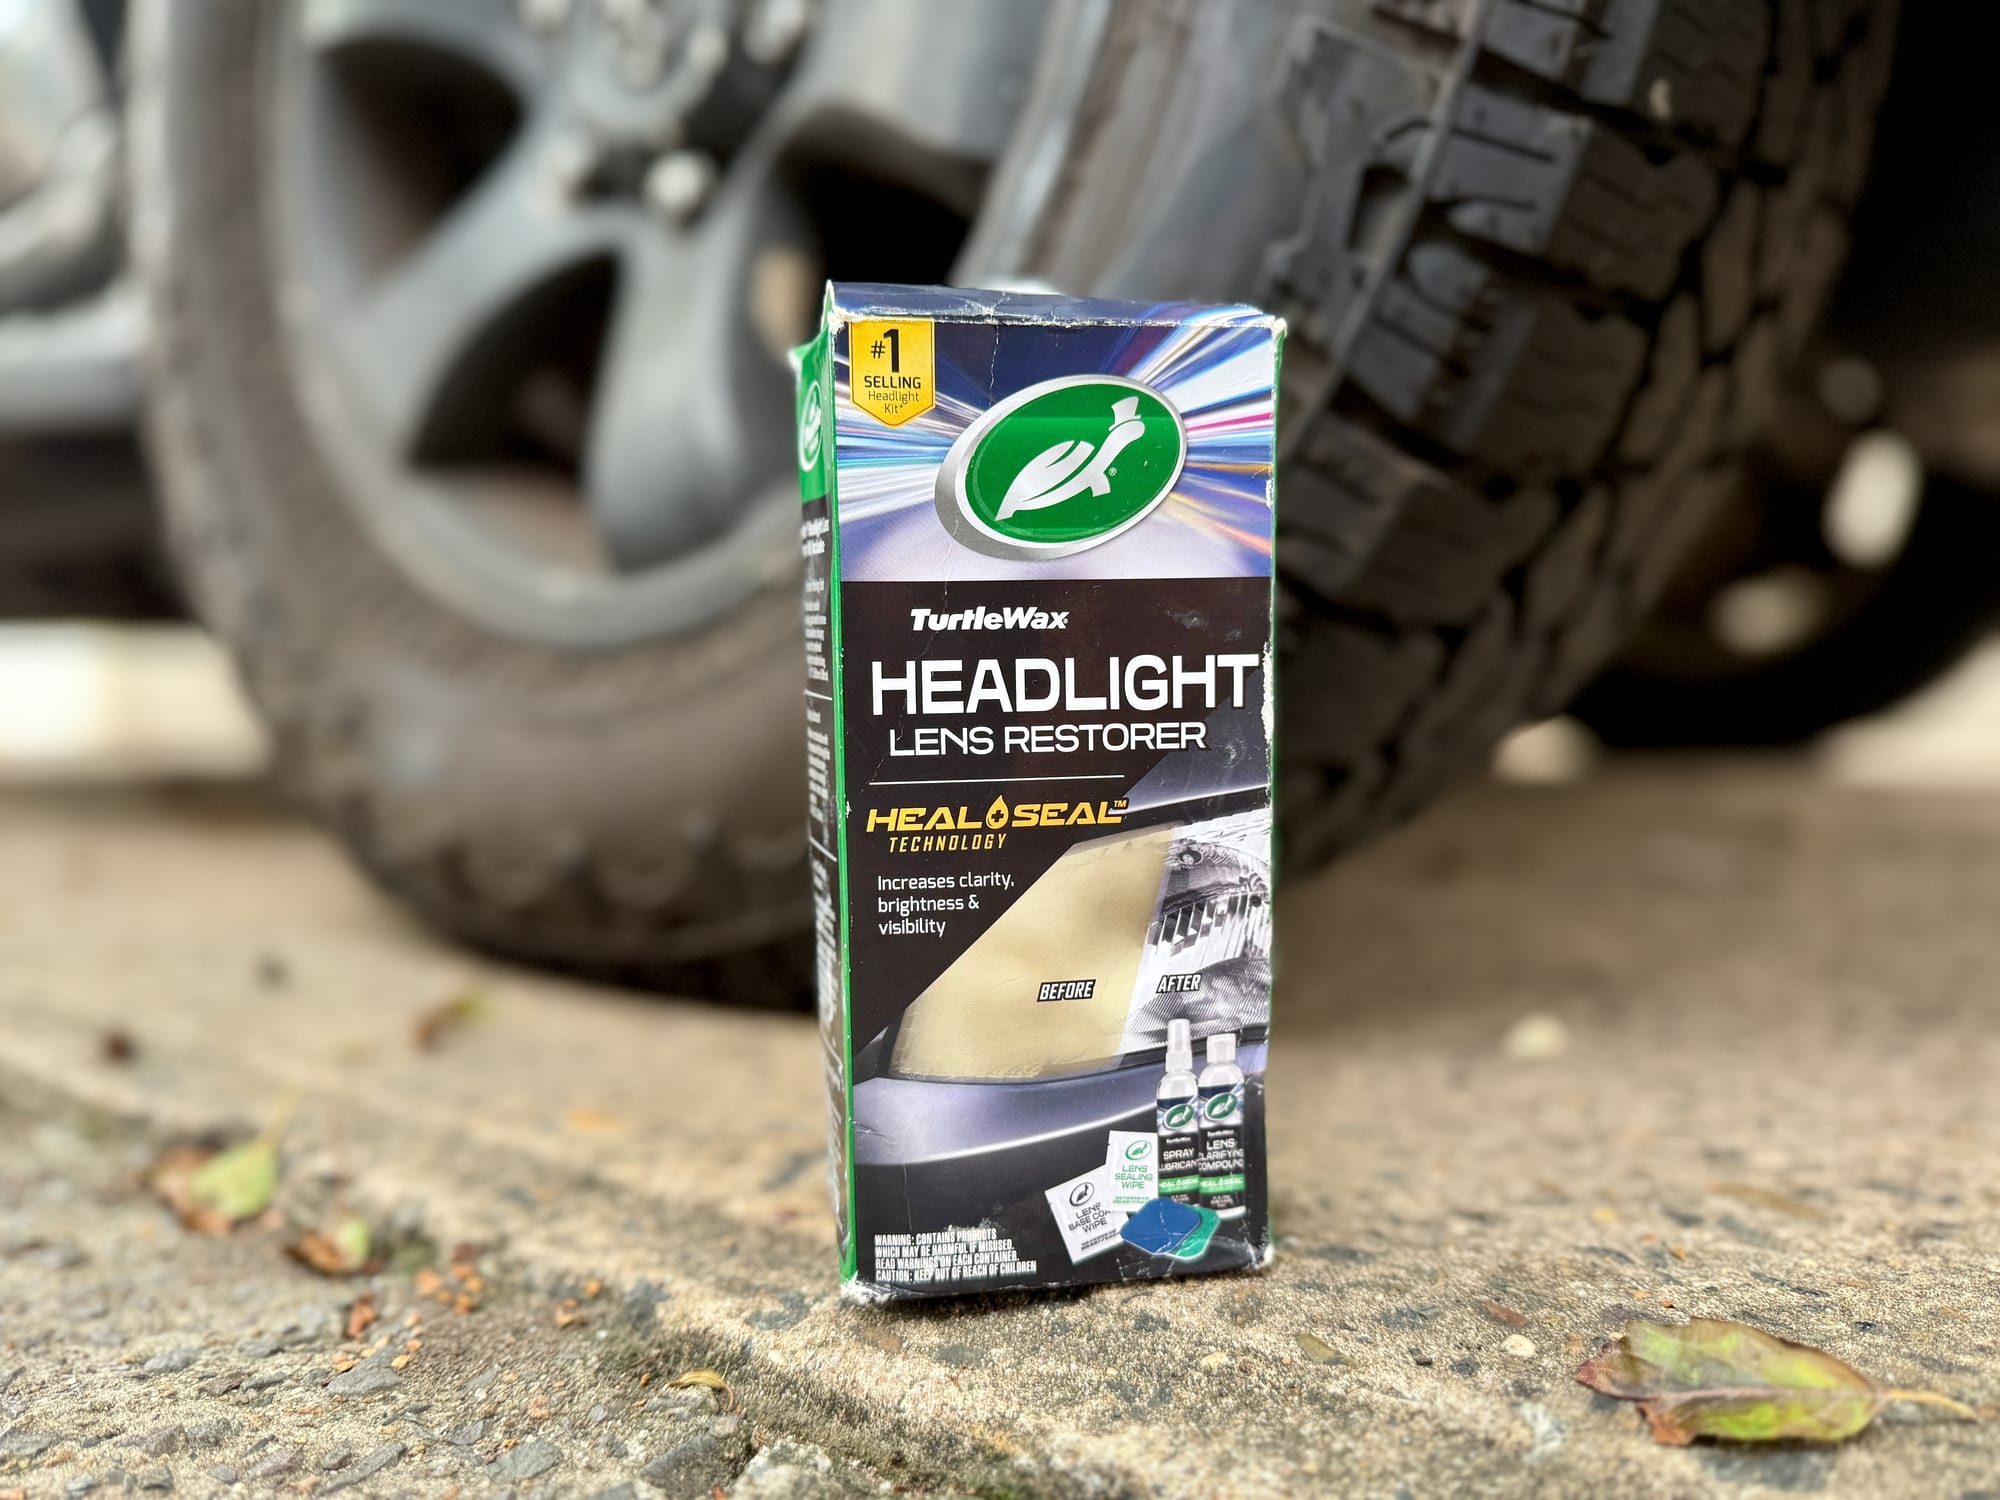
On the box it’s called the Headlight Lens Restorer. Everything is in the one small box: a bottle of lens clarifying compound, a bottle of spray lubricant, two double-sided restoration pads, a base coat wipe, a sealing wipe and a plastic glove. The two pads give four sanding stages, numbered 1 to 4, from 2,400 grit up to 8,000 grit. The whole job is done by hand, so you don’t need a drill or a polisher.
What’s not in the box: masking tape to protect the paint, and a couple of cotton cloths. Have those ready before you start.
What we like
- Yellowed lens came up clear
- No drill or power tool needed
- Numbered pads, clear steps
- Sealing wipes to protect the lens
- Enough in the box for a second go
- Far cheaper than new headlights
What we don’t
- About 15 min of rubbing per light
- Masking tape and cloths not included
- Sealing wipes are single use
Quick Specs
| Spec | Details |
|---|---|
| Brand | Turtle Wax |
| Model | T240KT |
| Compound | Lens clarifying compound4 oz |
| Lubricant | Spray lubricant4 oz |
| Pads | Two double-sided padsFour stages |
| Grit | 2,400 to 8,000 |
| Protection | Base coat wipe and sealing wipe |
| Tools needed | None: applied by hand |
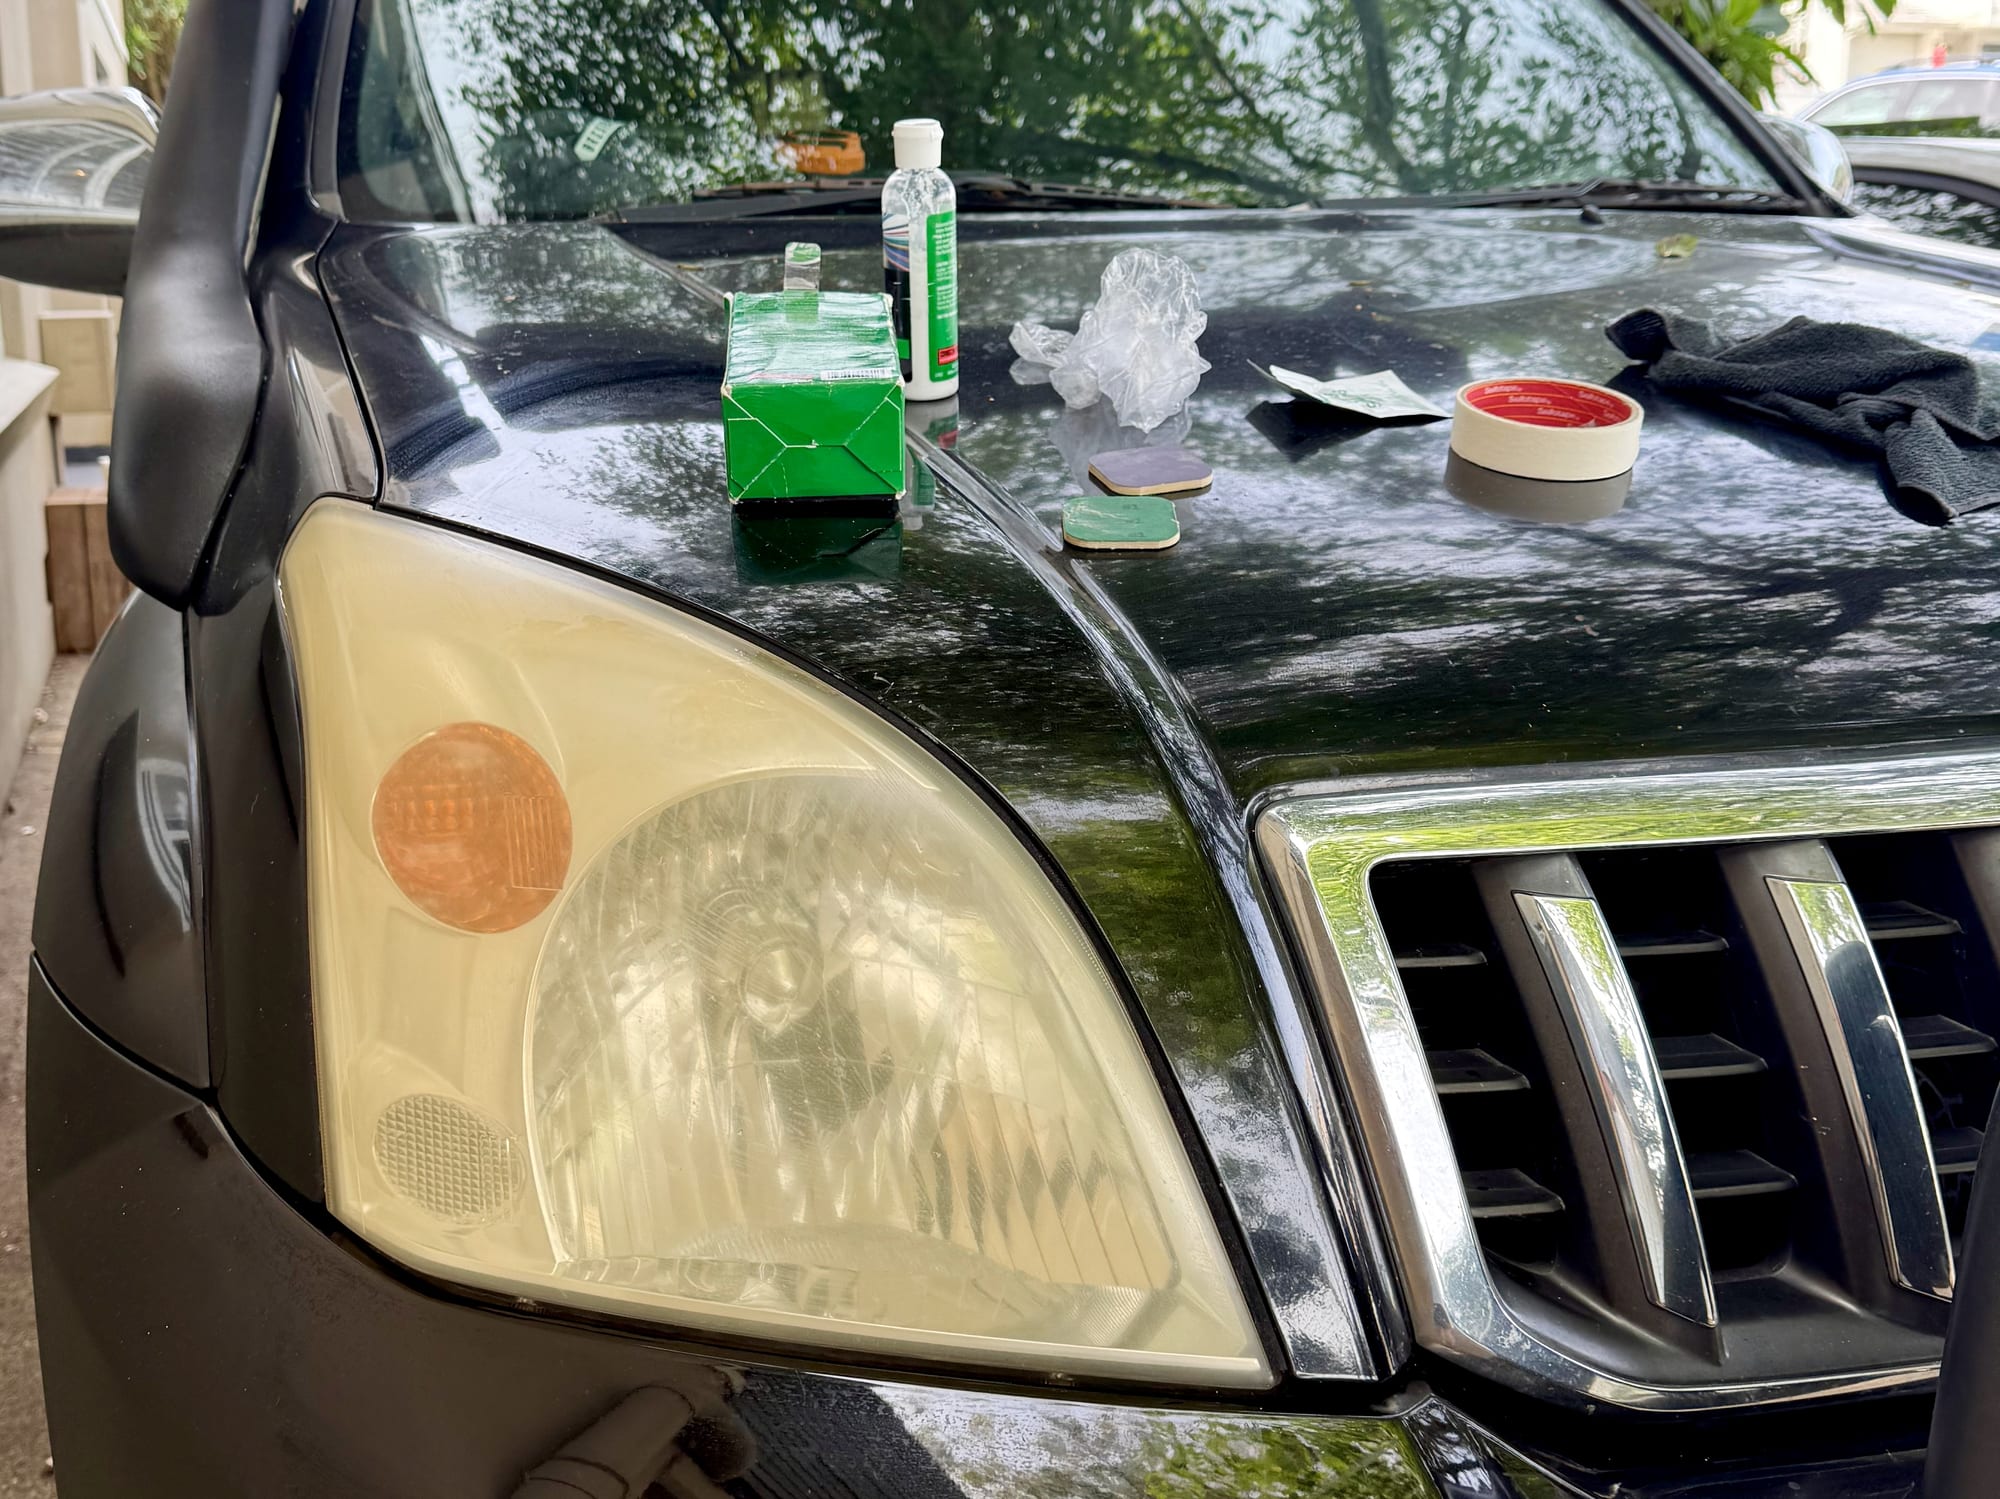
Before
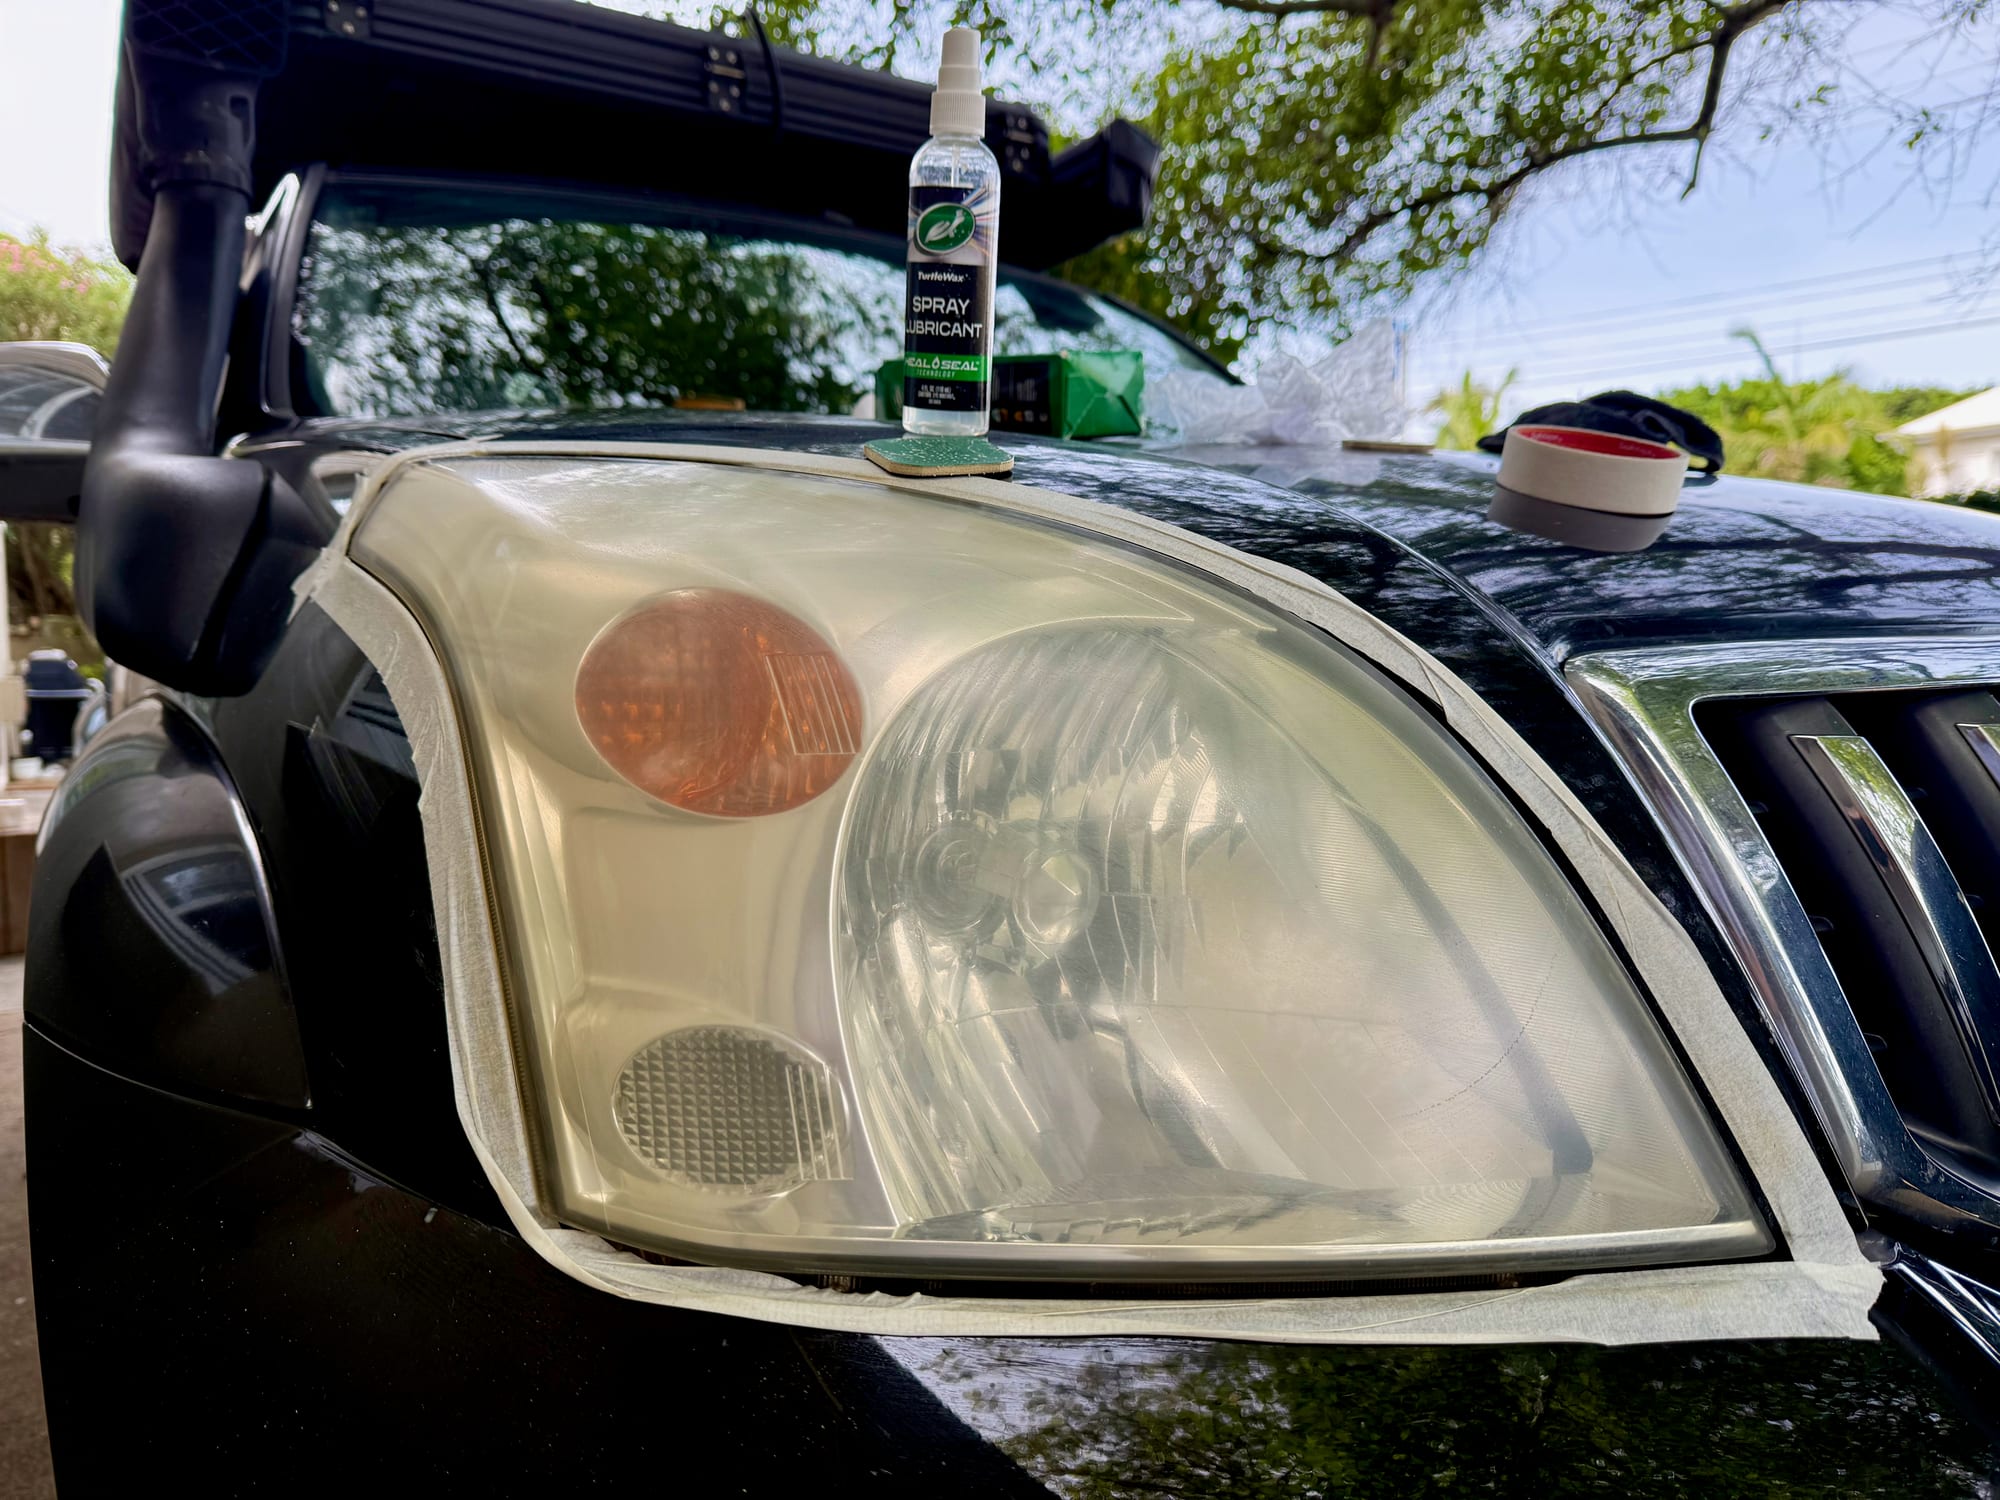
This is what we started with. The whole lens had a yellow film over it, and the reflector behind it was hard to make out. This is oxidation: the sun breaks down the outer layer of the plastic over the years.
Step by step
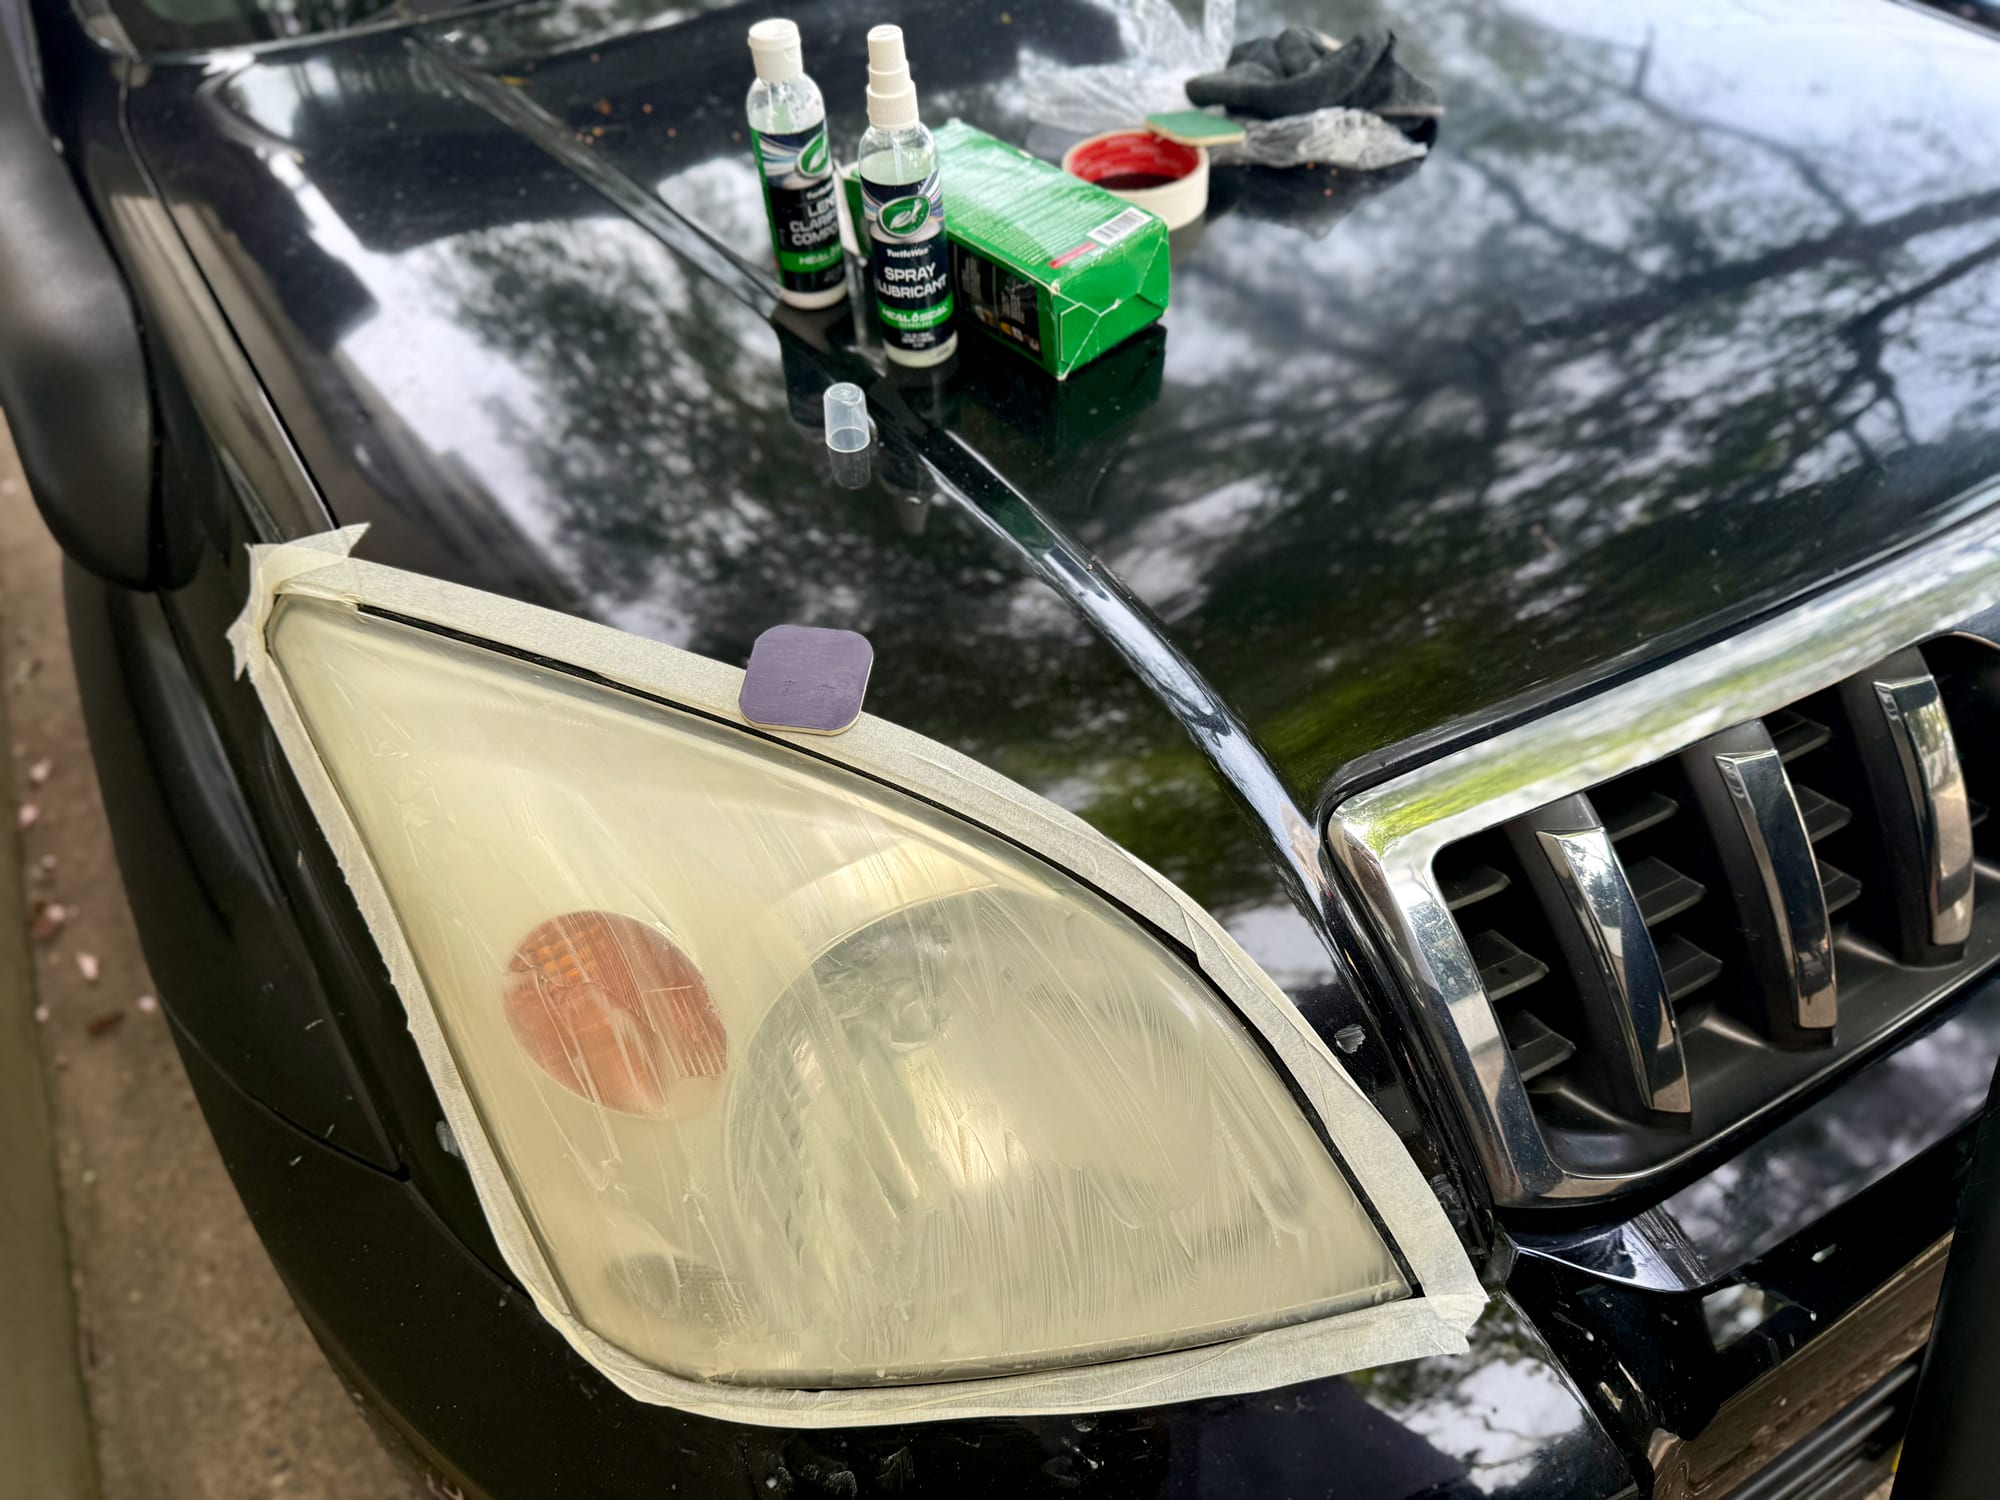
Wash and mask. First the lens gets a wash to take the dirt off. Then I ran masking tape all the way round it. The pads are abrasive, and the tape keeps them off the paint and the chrome.
Compound first. The first step is the clarifying compound on a cotton cloth, rubbed over the whole lens with firm pressure and buffed off. For light discolouration, that may be all a lens needs. Ours was well past that, so it was on to the pads.
Pad 1 and 2. The green side of the first pad is stage 1. You spray the lubricant on the pad and on the lens, and rub back and forth with firm pressure until much of the yellow is gone, keeping everything wet. Then you flip the pad to its tan side, stage 2, and rub for a minute at right angles to the first direction.
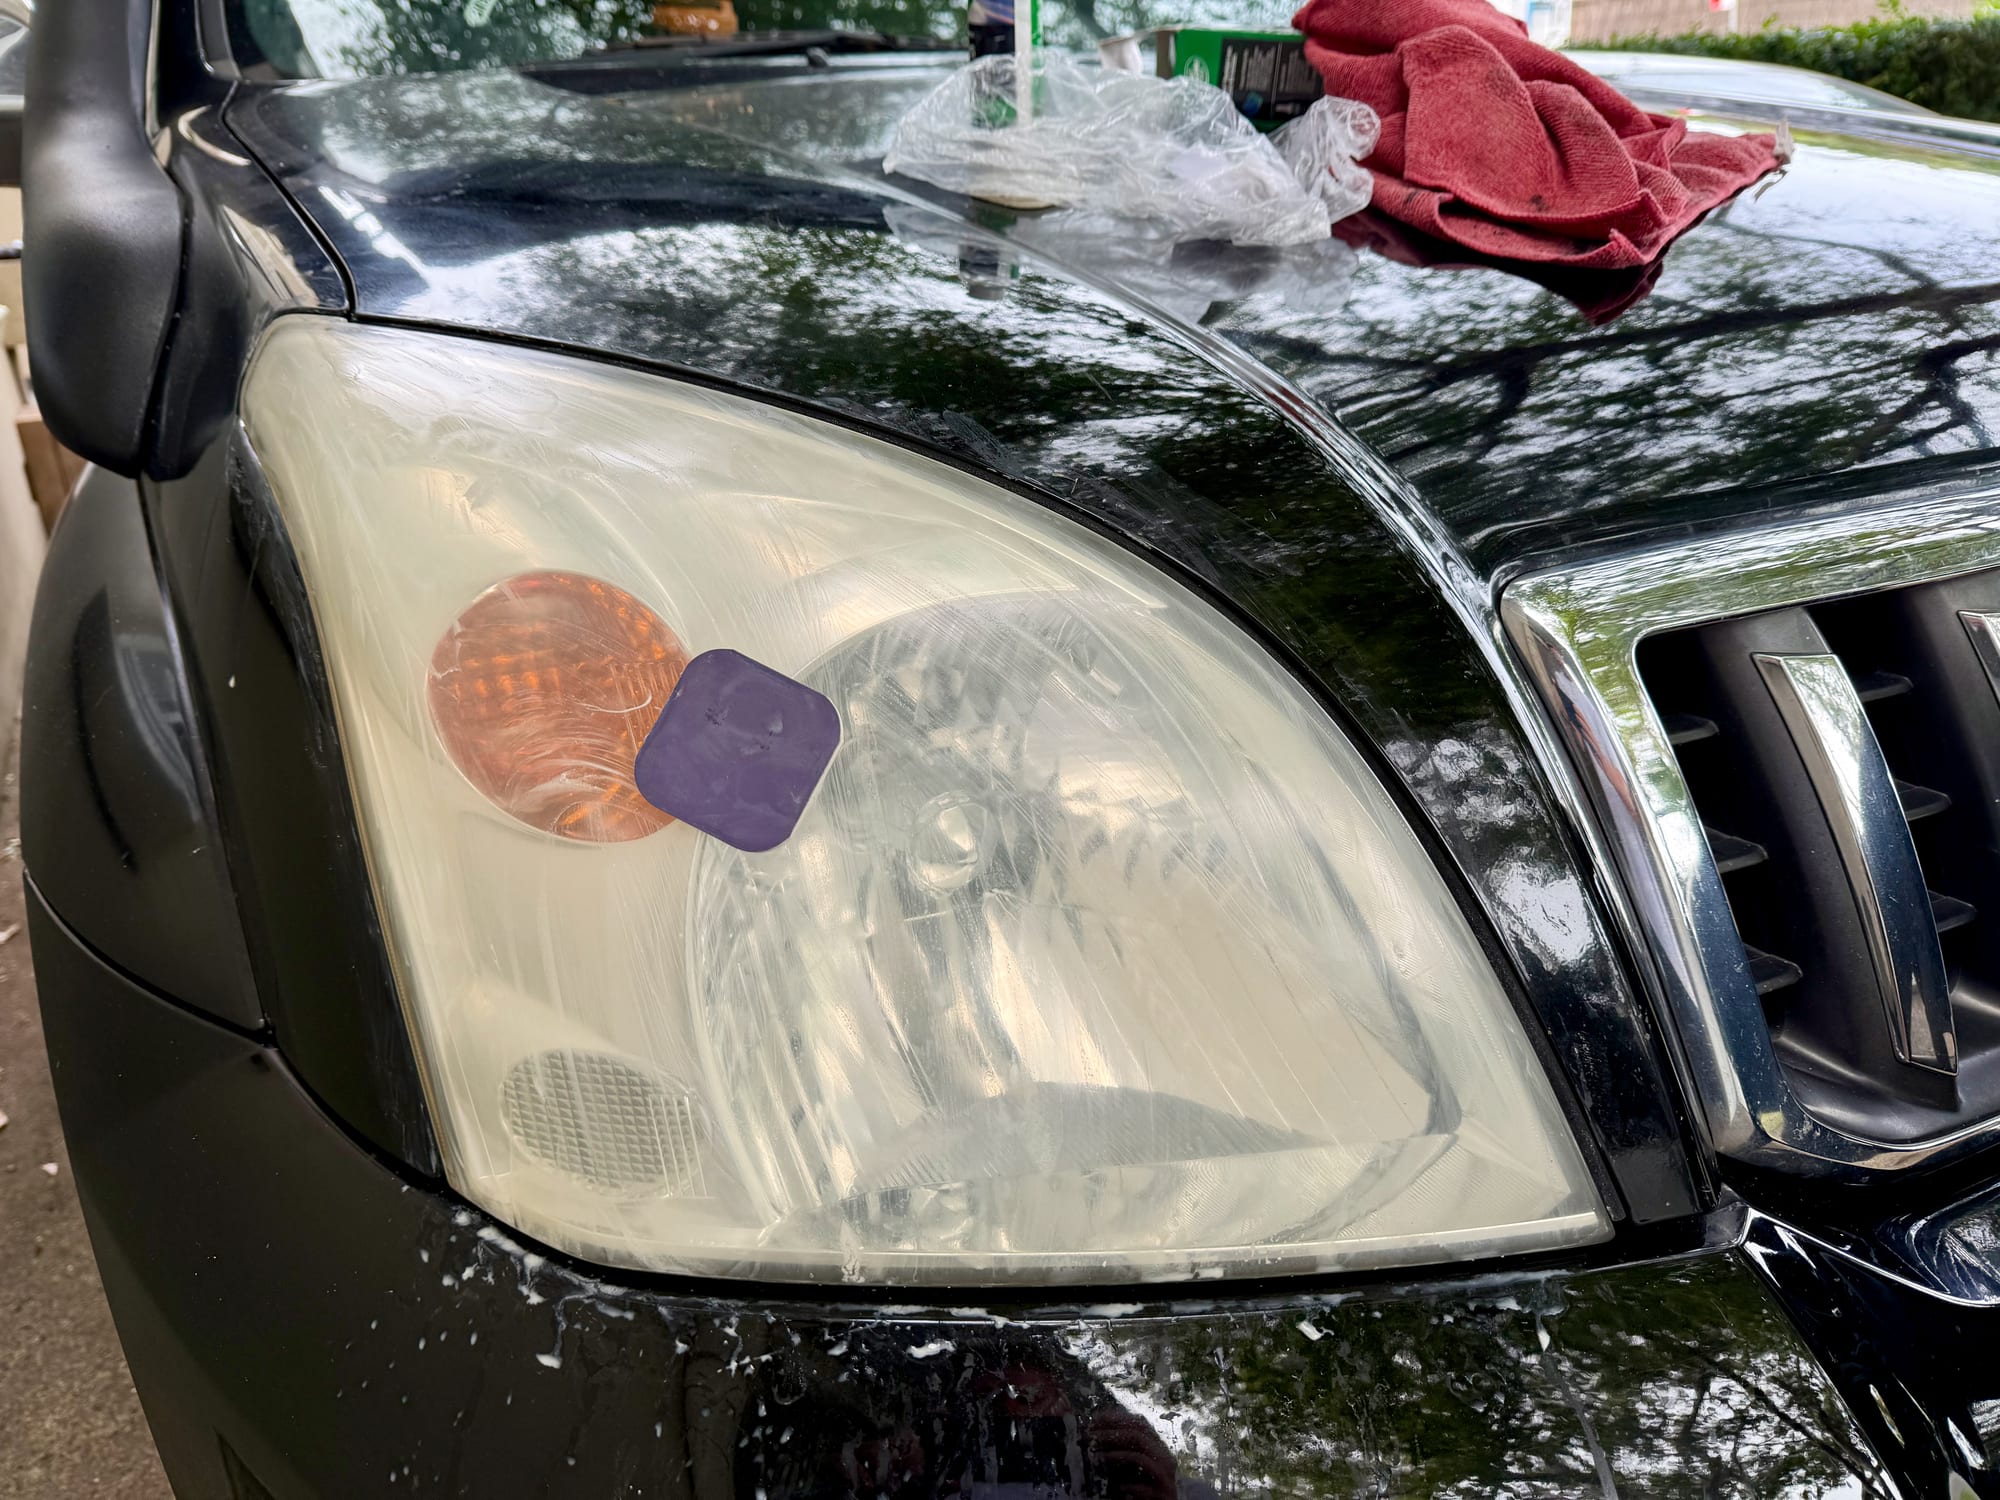
Don’t panic at this point. After sanding, the lens looks worse than when you started: an even, milky haze over the whole thing. That’s what it’s meant to look like. The yellow layer is gone, and the finer pads take the haze out again.
Pad 3 and 4. The second pad does the same job with finer grits: stage 3 on one side, then the purple side for stage 4, a minute each, changing direction every time and keeping the lens wet.
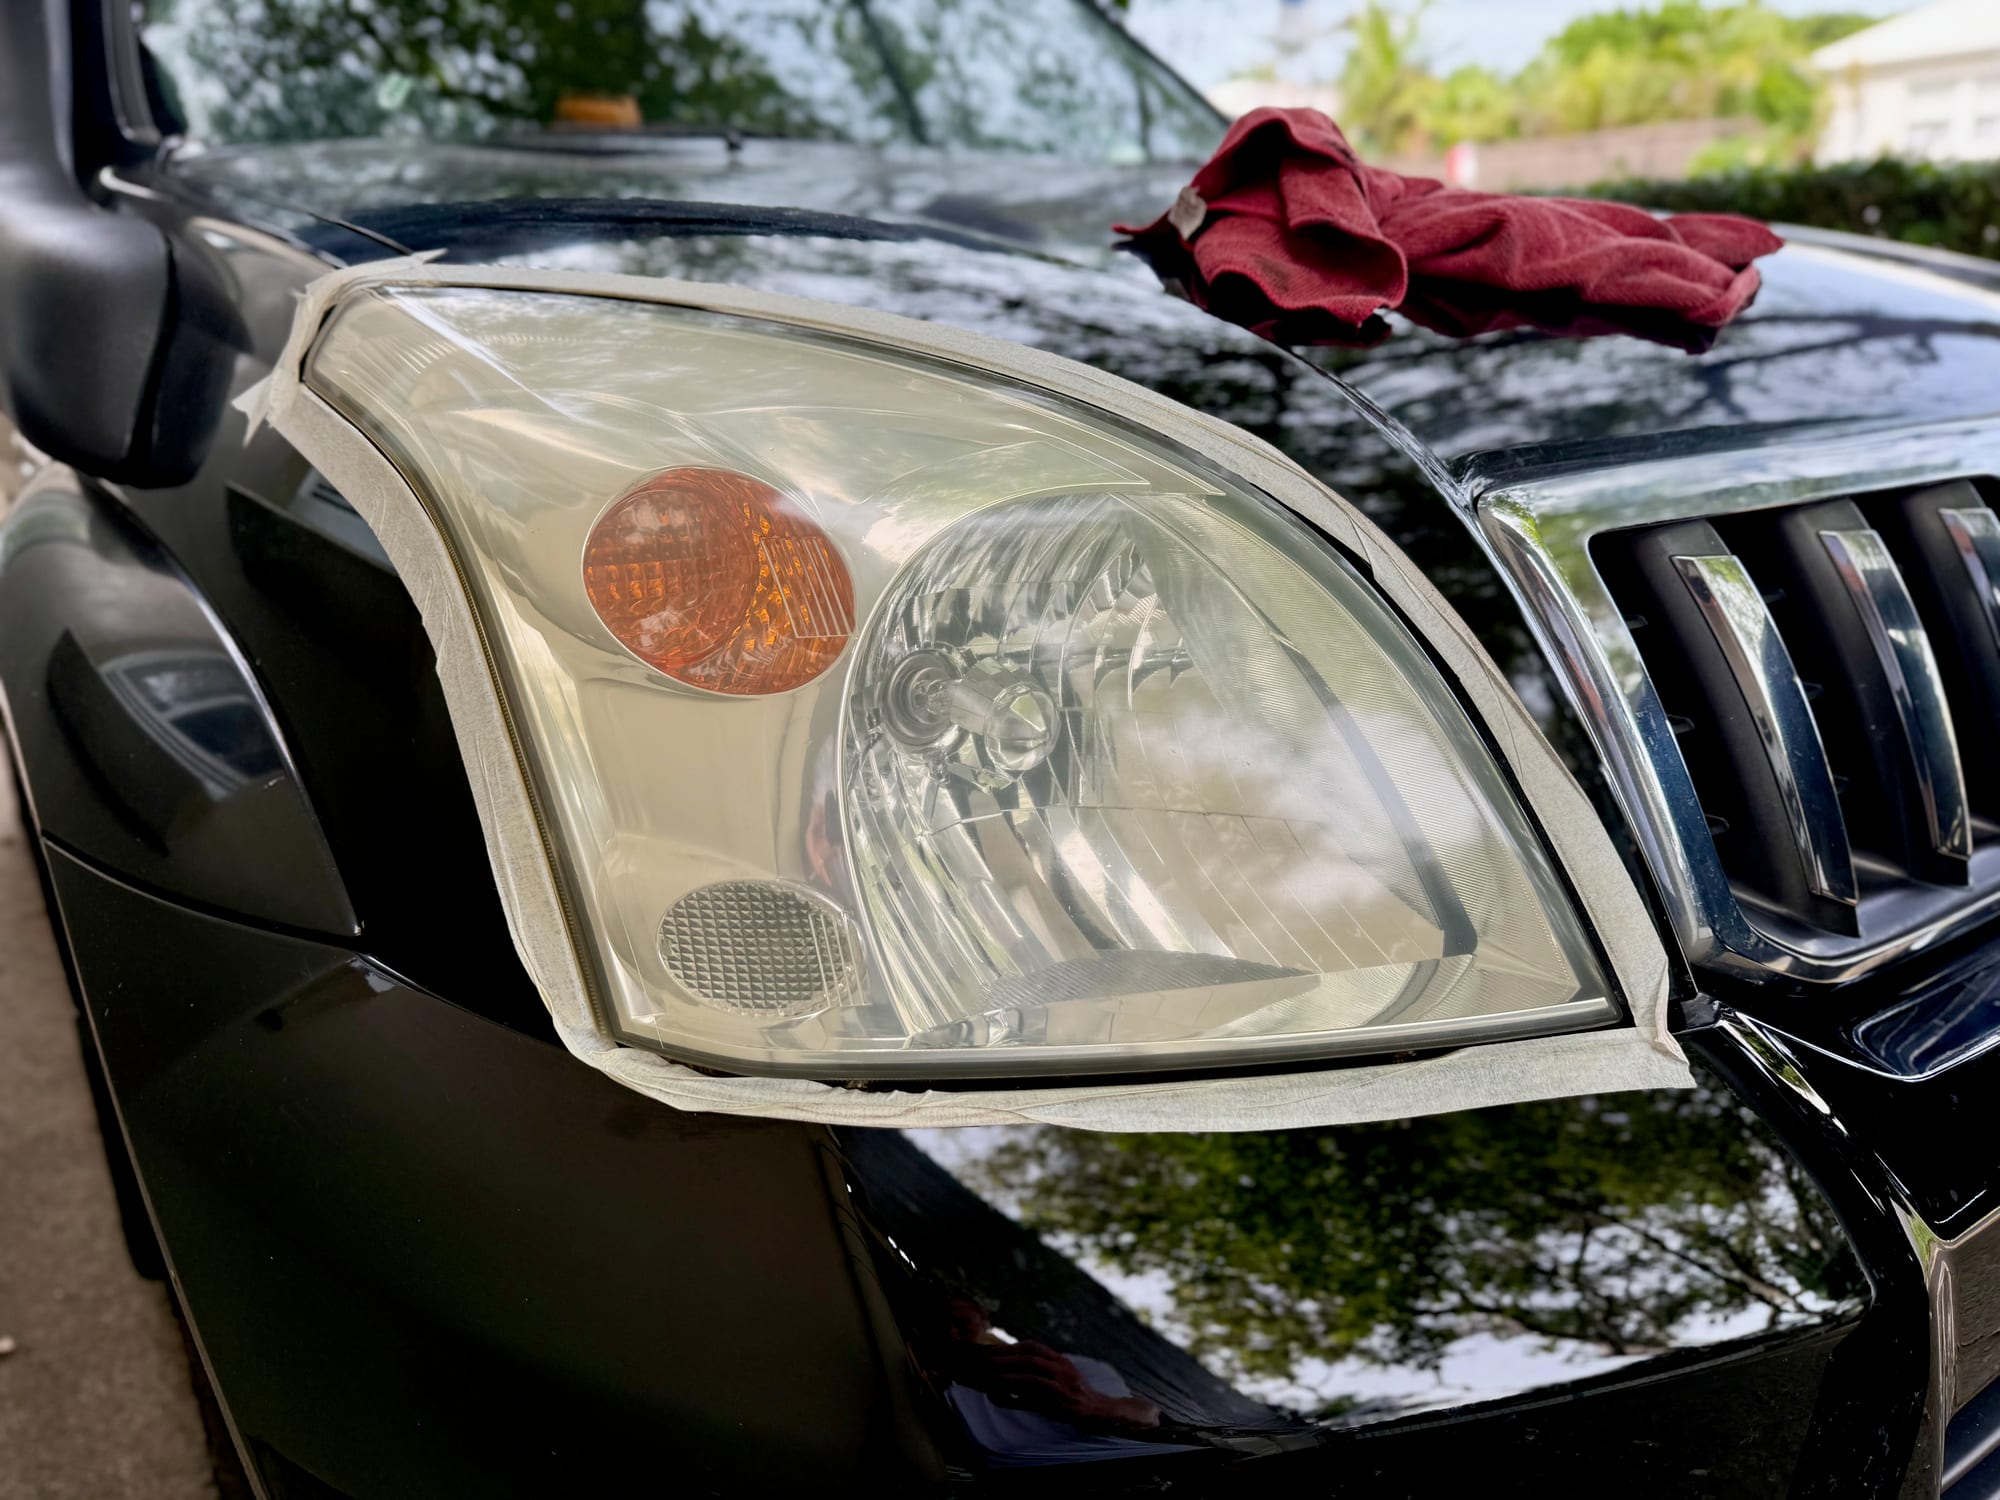
Compound again. Dry the lens, rub the clarifying compound in until it dries to a haze, and buff it off with a cotton cloth. This is the moment the lens goes clear.
Seal it. The last step is the two wipes, and it’s the one not to skip. Sanding takes off what was left of the lens’s original protective layer, so a bare lens would yellow again quickly. With the glove on, you wipe on the base coat, let it dry and follow straight away with the sealing wipe. The coating cures within 24 hours, and you can drive the car in the meantime. Both wipes are single use, so the box says to finish both headlights before you open them.
The result
The difference is big. The yellow is gone, the lens is clear and you can see the bulb and the reflector properly again.
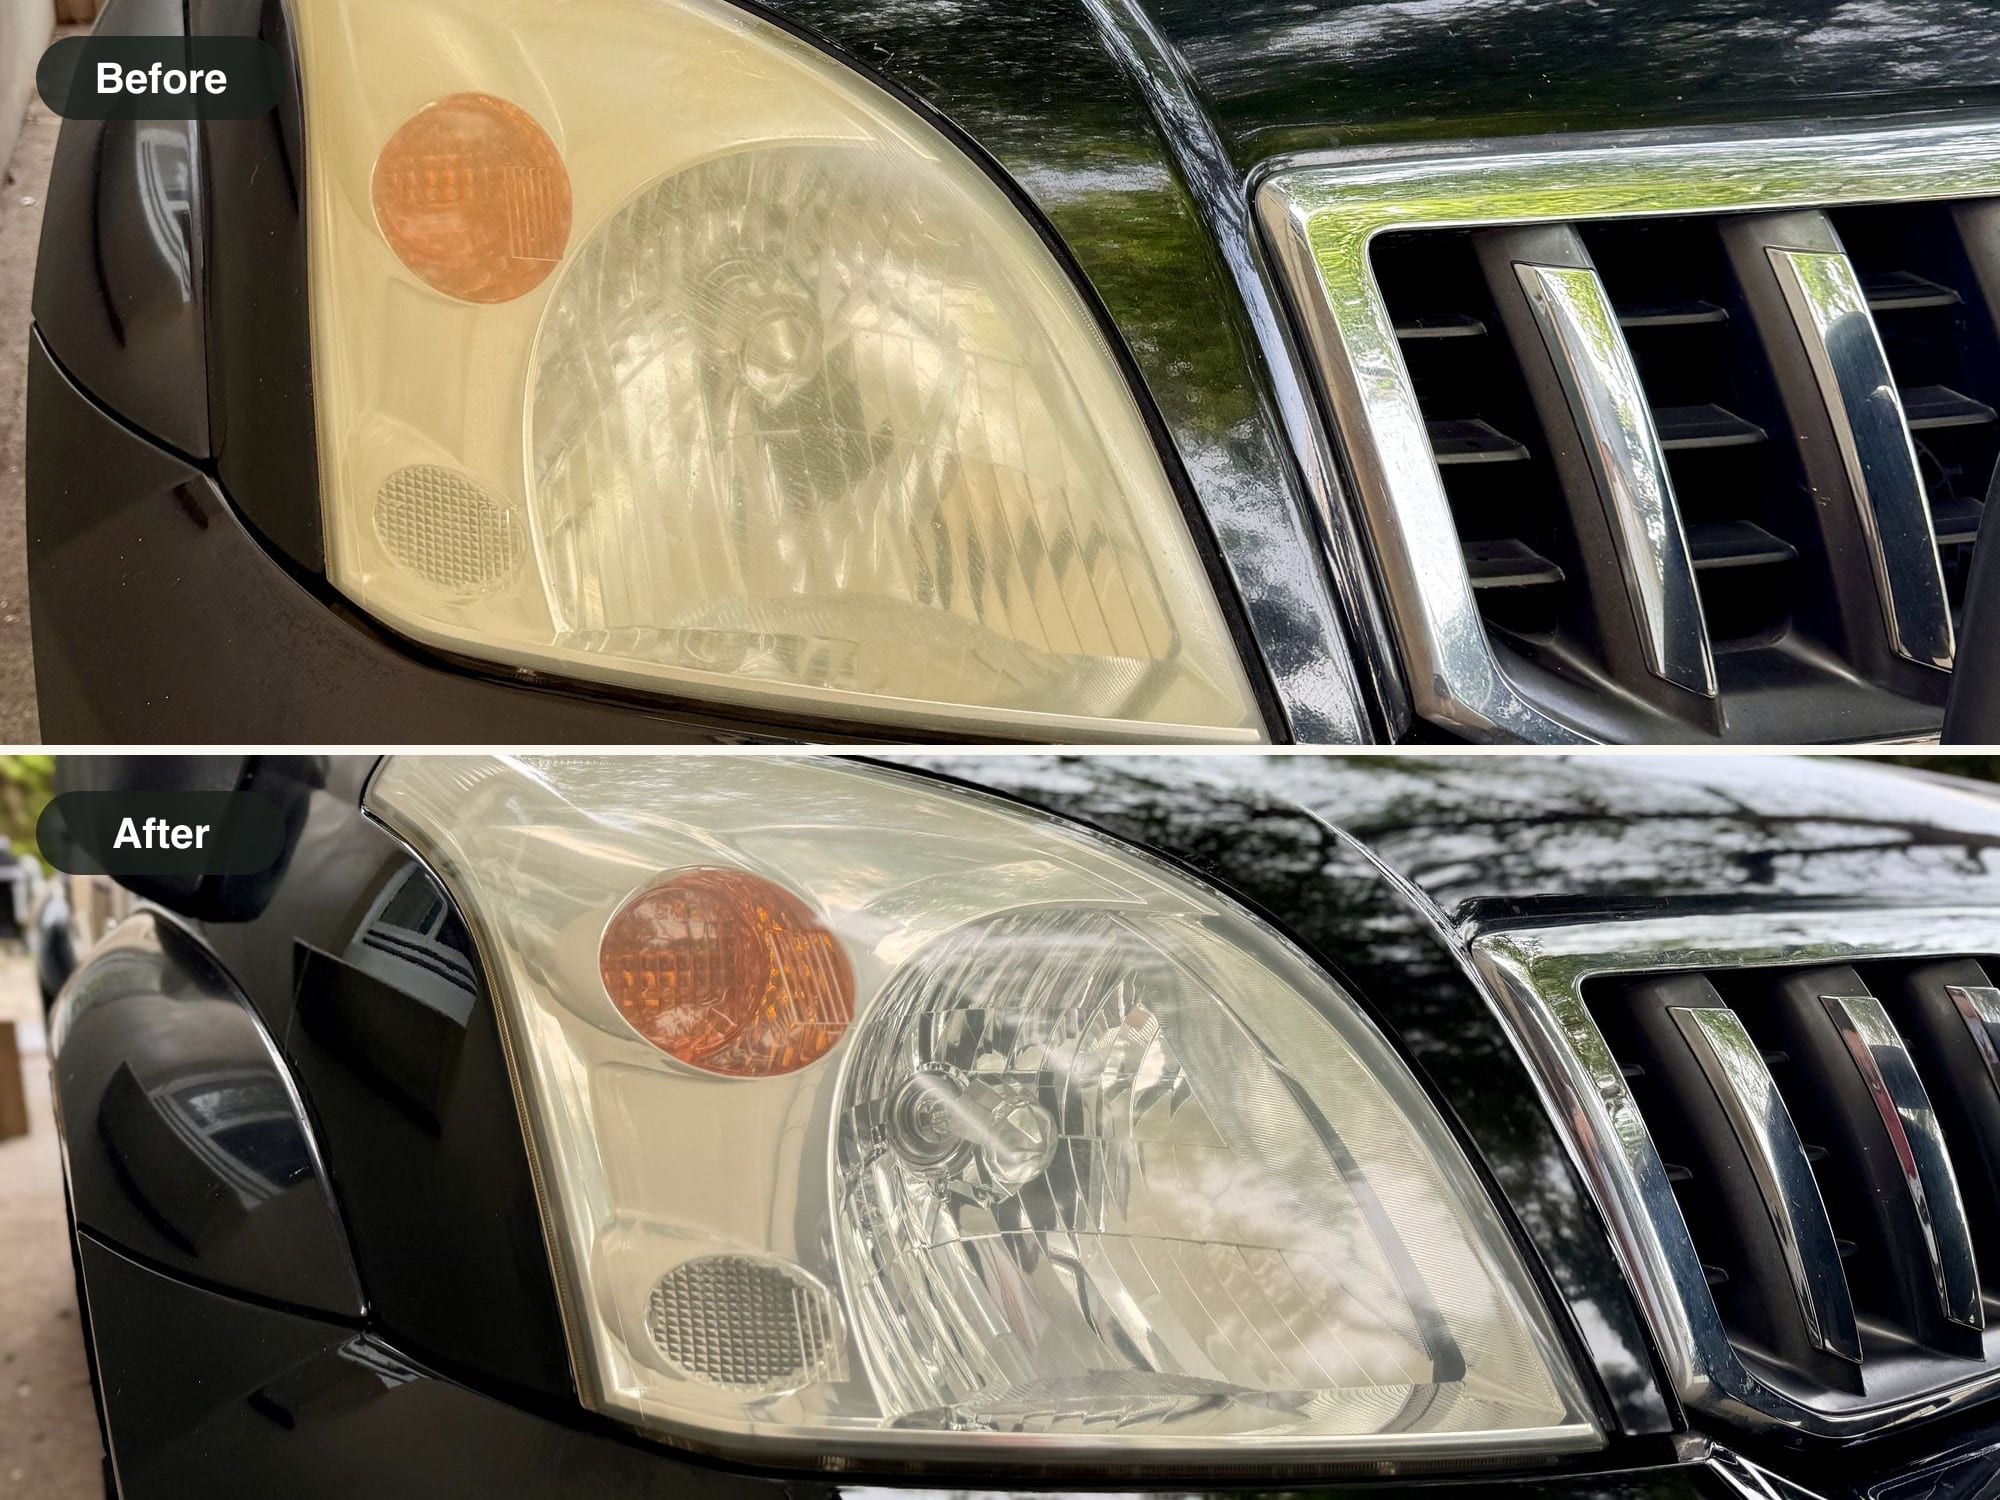
Turtle Wax says the kit restores a lens in under five minutes. It takes a bit longer than that. If you want good results, you need to keep working the pads for quite some time: I’d say about 15 minutes for each light. We did both headlights, so call it half an hour of rubbing, plus the masking and the wipes.
There’s quite a bit in the box, so we kept it. Nine months later we went over both headlights again to freshen them up, and there was still some left over for the headlight on our scooter. One kit goes a long way.
Clear lenses are only half of seeing well at night. If you do a lot of driving after dark on country roads, have a look at our XTM Helios driving lights review as well.
Conclusion: Turtle Wax Headlight Restorer KitConclusion
The Turtle Wax Headlight Restorer Kit turned the yellow, cloudy headlights on our 2006 Prado clear again, by hand and with no power tools. The numbered pads and the directions on the box make the order easy to follow, and the two wipes seal the lens at the end. It takes about 15 minutes of rubbing per light to get good results, and you need your own masking tape and cloths. There’s enough in the box to do it again: we freshened ours up after nine months and still had some left for the scooter. For about $50, against the price of new headlights, it’s well worth it.
A hand-applied kit with a compound, four sanding stages and sealing wipes that turned the yellowed headlights on our 2006 Prado clear again.
Allow about 15 minutes of rubbing per light. There’s enough in the box to do it again: we freshened ours up after nine months.
- 4WD tourers
- Caravanners
- Tradies & DIY
Yes. I paid about $50, which is a fraction of the cost of new headlights, and there’s quite a bit in the box: enough for both headlights, a freshen-up nine months later and the headlight on our scooter.